
Creating a Popup Storefront
Popup Storefronts are a same-page checkout experience that enables your customers to purchase products without leaving your website.
When a customer clicks “Buy Now”, your website prepares the order contents from our Store Builder Library. Then, a checkout window appears directly over your webpage. You can customize the styling, payment methods, and localization of each popup storefront. After your customer enters their payment information, FastSpring processes the payment and delivers their fulfillment.
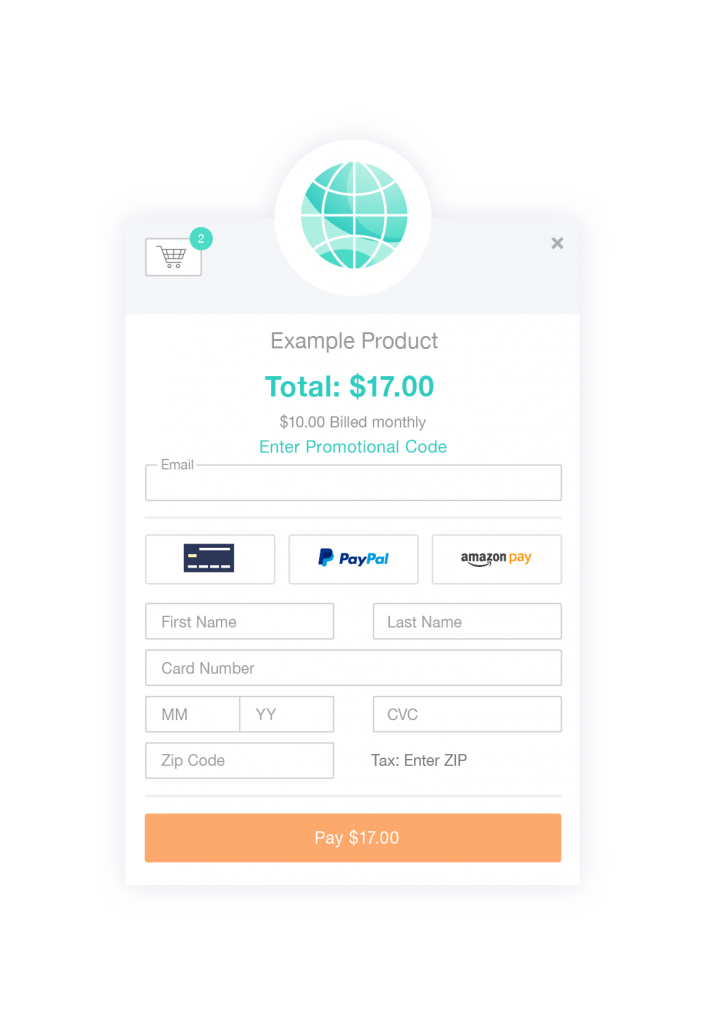
When editing your Popup Storefront, select Save and Preview at the top, right corner of the popup configuration page to display the current configurations. This preview uses a sample 14.95 monthly subscription.
When using a Popup Storefront, we recommend that you deploy a security certificate and use the https: protocol for your website. This prevents web browsers from displaying warning messages about non-secure pages.
Create a Popup Storefront
- Navigate to Storefronts > Popup Storefronts. Click Create Popup Storefront.
- Below Company Sub-Directory Storefront ID, enter an ID for the storefront. This becomes part of the storefront’s URL.
- Click Create. Your new popup storefront appears in the Popup Storefronts page.
After you create the popup storefront, you can click the Settings button to customize the styling, products, payment methods, and localization.
Configure a Checkout Experience
Click the Settings button on your popup storefront. This directs you to the checkout configuration page, where you can customize the customer experience. Click on the a subpage to customize the associated settings.
Checkout Experience
Configure the information that you would like FastSpring to display to your customers at checkout, and their customization options:
- Show Shopping Cart: True enables the popup storefront cart to appear on the popup storefront.
- Use Responsive Cart: If enabled, the cart view adapts to the size of the checkout device.
- Require email to start the order: True requires customers to enter their email address when they add an item to the cart. See Mailing List Entries for more information.
- Country and Language selector: Select whether the country and language selector is visible and adjustable to customers at checkout. This localizes the language and currency displayed to the customer based on their IP address.
- Show ‘Enter VAT ID’: True displays an ‘Enter VAT ID’ link to customers with applicable taxes at checkout. They can click this link to enter a tax exemption ID. FastSpring will remove taxes from their total.
Promotion
Enable customers to enter coupon codes at checkout to receive discounts. To configure a coupon or coupon code, see Coupons.
- Show ‘Promotional Code’ field: Show displays a field in which customers can enter valid coupon codes to receive the configured discount.
- ‘Promotional Code’ display type: Select the behavior or the promotional code field:
- Display coupon fields right away: The promotional code field appears in the storefront.
- Display ‘Enter Coupon Code’ link which exposes coupon field when clicked: Customers click a link to expose the coupon field.
Customer Information
Configure the information that you would like to collect from customers at checkout.
- Newsletter Subscription Checkbox: Displays a checkbox labeled “Get free updates about our products and offerings” below the email field. If the customer selects this checkbox, FastSpring sends mailing list webhooks.
- Company field: Displays a field in which customers can enter the name of their associated company at checkout.
- Force physical address collection on all orders: Requires customers to enter their billing address when they place an order.
- Force phone number collection: Requires customers to enter their phone number when they place an order.
- Auto/Manual subscription renewal: Control whether customers can opt out of automatic renewals. This converts their subscription to a Manual Renewal Subscriptions.
- Do not allow customers to opt out from saving payment details: FastSpring saves the payment details and automatically processes applicable rebills.
- Allow, Opt-Out: Customers can clear the checkbox to opt out of automatic renewals. Otherwise, FastSpring saves the payment details and processes automatic renewals.
- Allow, Opt-In: Customers can select the checkbox to opt in to automatic renewals. Otherwise, FastSpring does not save the payment information. Customers must manually pay for the next billing period in their Account Management portal. This does not apply to managed subscriptions.
Completion Page
After a customer successfully completes their purchase, FastSpring displays a custom completion page.
- Adjust popup window size based on contents: If selected, the popup storefront will automatically resize to include all products, licenses, and post-order instructions.
- Enable products on completion page: Select this checkbox to display purchased products on the completion page.
- Enable licenses on completion page: Select this checkbox to display licences for the purchased products on the completion page.
Purchaser Settings
FastSpring can send fulfillments to recipients who did not purchase the product.
- Allow Separate Billing Contact: Allow the billing information to differ from the fulfillment information.
- Enable Gift Purchases: Allow customers to make purchases for someone else. Gift purchases do not support subscriptions. This does not apply if you enable Allow Separate Billing Contact.
Customize the Styling of Your Popup Storefront
On the popup storefront, click Settings > Styling. Here, you can adjust the appearance and styling of the storefront to match your website.
Checkout Title
The Checkout Title is the heading of the popup storefront. You can configure this to include your company’s logo and branding styles.
- Checkout Logo and Title: Select images to appear at the top of your popup storefront.
- Show the predefined logo and first product’s display name: Your logo, and display name of the customer’s selected product appear at the top of the storefront.
- Show the predefined logo and checkout title: Your Checkout Logo and Title appear at the top of the storefront.
- Show predefined logo only: Only your logo appears at the top of the storefront.
- Do not show a logo or checkout title: No logo or product title appears in the storefront.
- Checkout title: Enter a title that appears below your logo. Click the drop-down to enter the title in additional languages.
- Logo for retina screens: If you plan to display a logo on the storefront, select Choose File to select a file that appears in the header of the Popup. FastSpring automatically adjusts the logo file for regular and low-resolution screens.
- Logo placement: Select where you would like to place your logo:
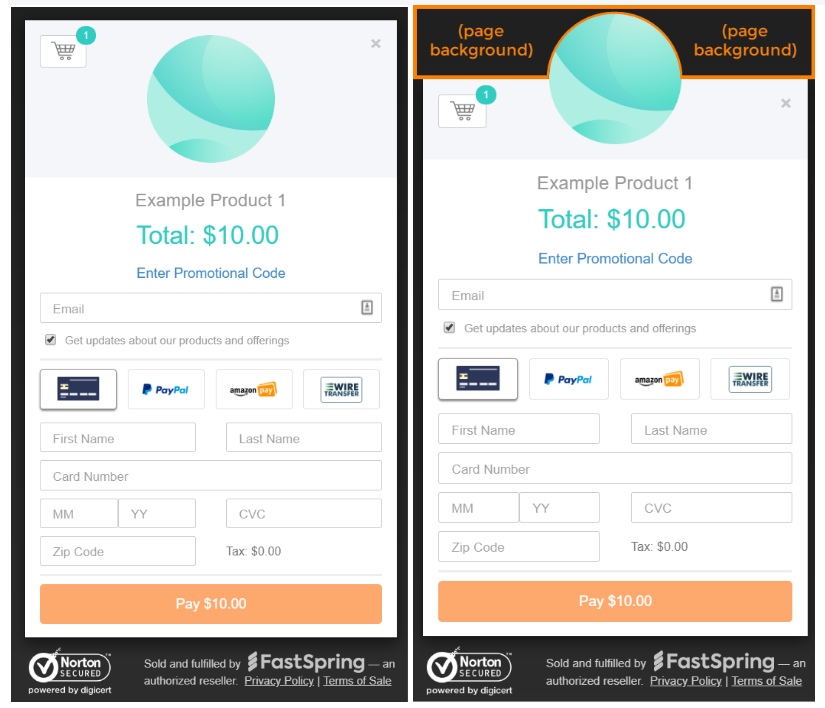
- Place the logo inside the popup: Your logo appears below the header background area (left image).
- Place the logo overlapping the popup and the area over it: Your logo overlaps with the header background (right image).
- Header background color: Select a color for your header’s background.
Checkout Text
Customize the font of your checkout title.
- Checkout title color: Select or enter the color that your checkout title appears in.
- Checkout font size: Select the size (in pixels) of the font for the checkout title.
- Checkout title font weight: Optionally, select Bold to bolden your checkout title.
Tax Text
- Tax Text Color: Select or enter the color of the text that displays the order’s tax.
Pricing Block
- Price line color: Select or enter the color of the subtotal displayed below the checkout title.
- Price line font size: Select the size (in pixels) to display the text in.
- Price line font weight: Optionally, select Bold to bolden your subtotal.
Payment Button
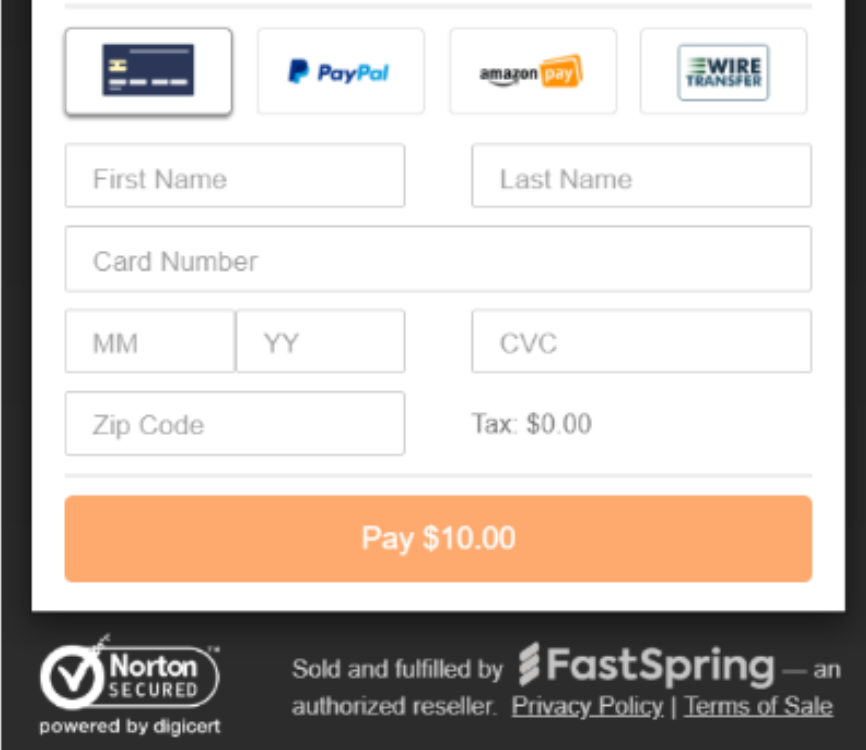
At the bottom of the popup storefront, FastSpring displays a “Pay” button. After entering their payment information, customers click this button to submit their payment.
- Color of the payment button: Enter the color of the button.
- Payment button text color: Enter the color of the text on the payment button.
- Color of the payment button on hover: Enter the color that the button changes to when a customer hovers their cursor over it.
- Payment button text color on hover: Enter the color that the text changes to when a customer hovers their cursor over it.
Corner Radius
Customize the roundness of the panels and buttons on your storefront. Selecting 0px results in square corners; higher pixels cause rounded corners.
- Window: Select the corner radius for the popup storefront window.
- Buttons: Select the corner radius for the buttons in the popup storefront.
Margins
Specify pixel measurements to customize margin heights in your Popup Storefront. Selecting higher values results in larger margins.
- Checkout title top margin: Select the amount of space to appear above the checkout title.
- Checkout title bottom margin: Select the amount of space to appear below the checkout title.
Order Total, Tax, and Savings
Specify pixel measurements to customize spacing between your order total, tax applied, and applicable discounts.
- Order pricing line bottom margin: Enter the amount of space to appear below the product price.
- Order pricing whole block bottom margin: Enter the amount of space below the pricing and promotional code fields.
Completion Page
After a customer completes their transaction, FastSpring redirects them to your completion page. You can customize the appearance of your completion page by navigating to Settings > Styling. The completion page settings are at the bottom of that page.
Download Button
Customers can click the download button on the completion page to download their fulfillments.
- Color of the download button: Enter the main color of the Download Now button.
- Color of the download button text: Enter the color that the text, “Download Now” appears in.
- Color of the download button on hover: Enter the color that the button changes to when a customer hovers their cursor over it.
- Color of the download button text on hover: Enter the color that the “Download Now” text changes to when a customer hovers their cursor over it.
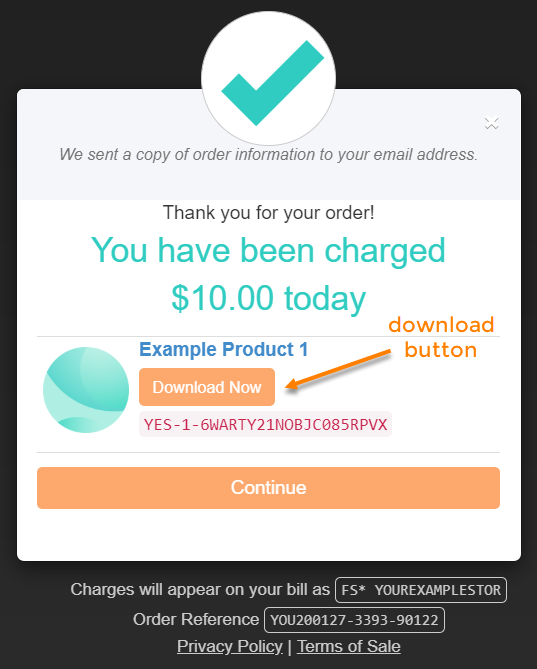
Continue Button
Customers can click Continue on the completion page to access their account management portal.
- Color of the continue button: Enter the main color of the Continue button.
- Color of the continue button text: Enter color of the ‘Continue’ text.
- Color of the ‘continue button on hover: Enter the color to which the Continue button changes when a consumer hovers their cursor over it.
- Color of the continue button text on hover: Enter the color to which the ‘Continue’ text changes when a consumer hovers their cursor over the button.
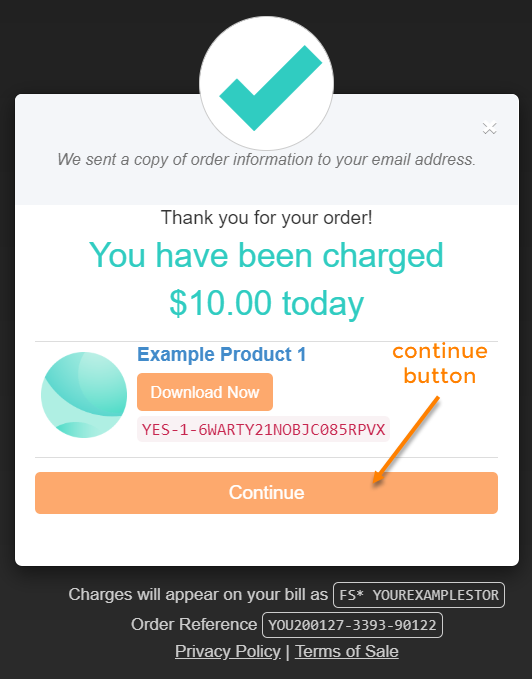
Checkmark Color
Customize the color of the checkmark on the completion page.
- Color of the successful order check mark on the completion page: Select or enter the color for the check mark that appears at the top of the completion page.
Analytics Integration
Configure optional integrations with Google Analytics and Google Tag Manager on the Analytics Integration subpage. By default, your popup storefront uses the settings configured in the Developer Tools menu, however you can override these settings on a specific storefront.
- Google Analytics Integration Behavior: Select whether you would like to integrate Google Analytics in this storefront. If you select Use custom Google Analytics property ID, enter a custom property ID in the field below.
- Google Tag Manager Integration Behavior: Select whether you would like to integrate Google Tag Manager in this storefront. If you select Use custom Google Tag Manager container ID, enter a custom property ID in the field below.
PayPal
Control the logo and store title that display in the PayPal login window. This only applies if PayPal is enabled in your store and a customer selects PayPal as their payment method.
- Checkout Brand Logo: Select an image to appear at the top of the login window.
- Checkout Brand Title: Enter the brand title that appears in the ‘Cancel and return’ link on the PayPal login window.
Updated about 2 months ago